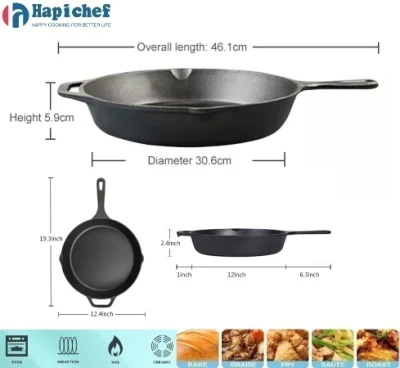
Essential Steps for Preparing a Cast Iron Skillet for Long-Lasting Use
Prepping a Cast Iron Pan A Complete Guide
When it comes to cookware, few items are as revered as the cast iron pan. Known for its exceptional heat retention and long-lasting durability, a cast iron skillet is a staple in kitchens around the world. However, to enjoy the full benefits of cooking with cast iron, proper preparation is essential. Whether you've just purchased a new pan or inherited a vintage one, following these steps will ensure it serves you well for years to come.
Step 1 Cleaning the Pan
If your cast iron pan is new, it may come pre-seasoned, but you still need to give it a good wash before your first use. Use warm water and mild dish soap to rinse off any factory coatings or dust accumulated during packaging. For older pans that have seen better days, a thorough cleaning might be necessary. Scrub with a stiff brush or non-abrasive pad to remove any rust or old seasoning. Avoid using soap on older pans as it can strip the natural oils that contribute to seasoning. Instead, just use warm water and a brush.
Step 2 Drying the Pan
Proper drying is crucial to prevent rusting. After cleaning, dry your pan thoroughly with a clean towel or by placing it on a low flame on the stovetop. Make sure there is no moisture left, as any leftover water can cause rust to develop over time. A completely dry pan is essential for the next step in the seasoning process.
Step 3 Seasoning the Pan
Seasoning is the process of applying a layer of oil to the pan and heating it to create a non-stick surface. Choose a cooking oil with a high smoke point, such as flaxseed oil, vegetable oil, or canola oil. Apply a thin layer of oil all over the pan using a paper towel or cloth; both the interior and exterior surfaces should be covered.
prepping a cast iron pan factory

Next, preheat your oven to 450°F (232°C). Place a sheet of aluminum foil on the bottom rack to catch any drips, and then place the oiled pan upside down on the middle rack. Bake for one hour to ensure even seasoning. After one hour, turn off the oven and allow the pan to cool inside. This step helps the oil polymerize, creating a durable non-stick surface.
Step 4 Regular Maintenance
To maintain your cast iron pan, make it a habit to season it regularly, especially after cooking acidic foods like tomato sauce. After each use, avoid soaking it in water; instead, scrub it with a brush and rinse it with hot water. If needed, reapply a small amount of oil and heat it on the stovetop to maintain the seasoning.
Avoiding cooking sprays is also advisable, as they can leave a sticky residue that is hard to clean. Whenever you notice the seasoning wearing off—signaled by food sticking or dull surfaces—consider reseasoning the pan.
Step 5 Storing the Pan
When storing your cast iron skillet, place a paper towel inside the pan to absorb moisture and prevent rust. Store it in a dry place, and avoid stacking other cookware directly on top of it, as this can scratch the seasoned surface.
Conclusion
Prepping a cast iron pan is a vital step towards creating a beloved kitchen staple that can last a lifetime. With a little care and attention, your cast iron skillet will not only cook better but also become more seasoned over time, enhancing the flavors of your dishes. Embrace the process, and soon you’ll appreciate the joys of cooking with one of the most versatile pieces of cookware you can own. Whether frying, baking, or searing, your cast iron skillet is ready to deliver great results while standing the test of time.
-
Why Every Home Cook Needs a Cast Iron Meat PressNewsNov.12,2024
-
Unlock Perfectly Seared Steaks with the Cast Iron Meat PressNewsNov.12,2024
-
Master the Art of Cooking Thick Cuts of Meat with a Cast Iron Meat PressNewsNov.12,2024
-
How to Care for Your Cast Iron Meat Press: Tips for Longevity and PerformanceNewsNov.12,2024
-
How a Cast Iron Meat Press Enhances the Flavor and Texture of Your BurgersNewsNov.12,2024
-
Roasting Pan for Perfect MealsNewsNov.04,2024
-
Perfect Skillet for SaleNewsNov.04,2024
